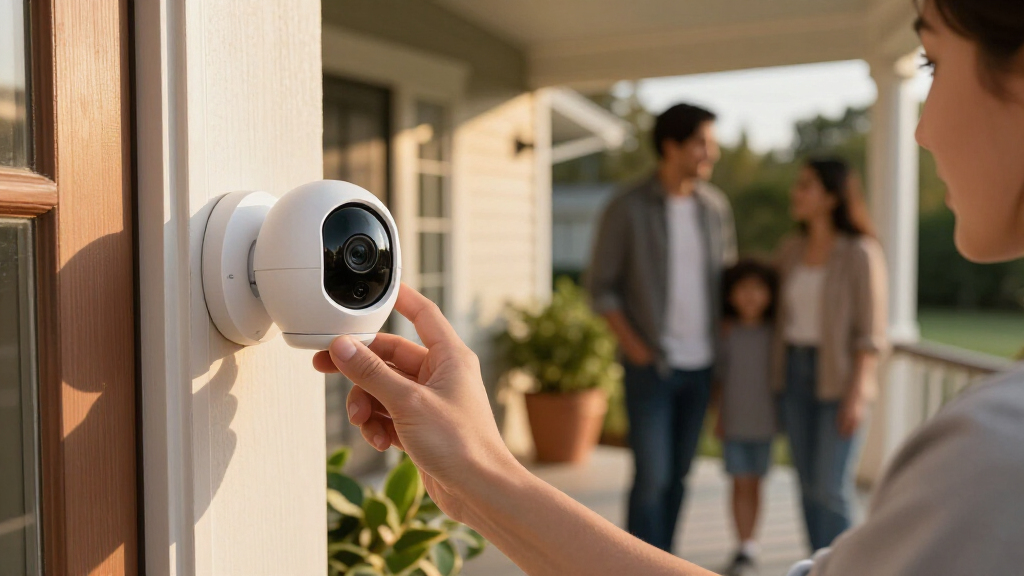
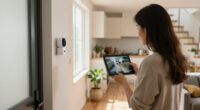
Set up smart home security cameras by choosing useful locations, mounting each camera, connecting it to your home network, and testing live video, recording, and alerts. This guide is for homeowners and renters who can use a smartphone app and have permission to install cameras where they live. Allow 1-3 hours for a small system; mounting time varies with camera type and the surfaces involved.

Get the latest gadgets delivered free — and shop member deals
- Fast, free delivery on millions of items
- Access to Prime Big Deal Days deals on October 6–7
- Prime Video, Amazon Music and more included

Blink Outdoor 4 Wireless Security Camera System, 3 Cameras
- ✔ Camera count: 3
- ✔ Video resolution: 1080p HD
- ✔ Night vision: Infrared
Blink Outdoor 4 Wireless Smart Security Camera System, 5 Cameras
- ✔ Camera count: 5
- ✔ Video resolution: 1080p HD
- ✔ Field of view: 143° diagonal
Blink Outdoor 4 Wireless Smart Security Camera System, 2-Camera Kit with Sync Module Core
- ✔ Camera count: 2
- ✔ Video resolution: 1080p HD
- ✔ Night vision: Infrared
Difficulty: Beginner | Time: 1-3 hours
What You’ll Need
Tools & Materials:
- Smart security camera and its mounting hardware
- Smartphone or tablet with the camera maker’s app
- Home Wi-Fi network name and password
- Power outlet or charged battery, as required by the camera
- Drill, screwdriver, pencil, and suitable wall anchors if mounting hardware requires them
- Ladder for high locations, if needed
Knowledge:
- Basic smartphone app use
- How to connect a device to a home Wi-Fi network
- Basic drilling and safe ladder use if installing a wall-mounted camera
Check the camera’s Wi-Fi band, power requirements, operating temperature, and weather rating against your home and network. A camera rated for indoor use must not be installed outdoors. Renters should get the property owner’s approval before drilling or changing fixtures. Check local rules and household expectations before recording audio or areas used by other people.
Blink Outdoor 4 Wireless Security Camera System, 3 Cameras
The three-camera kit earns our top spot because it strikes a useful balance between coverage and simplicity. Three cameras can monitor several likely approaches—such as a front entrance, driveway, and back door—without asking every household to plan for five mounting locations. It shares the lineup’s 1080p live view, infrared night vision, two-way talk, and Alexa compatibility, so choosing the middle kit does not mean giving up the core smart home features.Compared with the two-camera kit, the extra camera gives us more flexibility to cover another entrance or side of the home. The five-camera kit goes further, but its broader coverage only helps if we actually have the locations and Wi-Fi reach to use all five. Batteries are rated for up to two years, which can reduce routine maintenance, though actual life depends on use and conditions. The important limitation is shared with the other picks: the included Sync Module Core offers no local storage, and cloud clips and person detection require a subscription. Choose this one for balanced outdoor monitoring; skip it if local recording is essential or two cameras already cover your needs.
Pros:
- Three cameras provide more flexible coverage than the two-camera kit.
- 1080p live view, infrared night vision, and two-way talk cover core monitoring needs.
- Batteries are rated for up to two years, depending on use and conditions.
- Alexa compatibility supports voice control in compatible smart homes.
Cons:
- The included Sync Module Core does not support local storage.
- Cloud clip storage and person detection require an optional subscription.
Best for: Households that want to monitor several outdoor approaches without installing a five-camera system.
Not ideal for: Buyers who require included local storage, or who need only two cameras for a small area.
Bottom line: We recommend the three-camera kit for balanced coverage, provided its subscription-based features and lack of included local storage fit your plans.
“We recommend the three-camera kit for balanced coverage, provided its subscription-based features and lack of included local storage fit your plans.”
Blink Outdoor 4 Wireless Smart Security Camera System, 5 Cameras
When the priority is covering more ground, the five-camera kit offers the most reach in this lineup. It can serve homes with multiple entrances or larger outdoor areas where two or three viewpoints would leave obvious gaps. The cameras retain the same 1080p video, infrared night vision, two-way audio, and enhanced motion detection as the smaller kits; the reason to choose this version is the number of views, not a higher camera specification.Compared with our three-camera pick, the two additional cameras may help monitor more sides of a building, but they also mean more mounting decisions and battery-powered devices to manage. The stated battery life is up to two years, depending on settings, use, and environment, and the batteries are non-rechargeable. This kit is therefore a better match for a buyer with a coverage plan in mind than for someone tempted by a larger bundle without clear camera placements. Storage remains its main compromise: the Sync Module Core has no local-storage support, and cloud clips and person detection require a subscription. If three cameras already cover your entrances, the middle kit is the more measured choice.
Pros:
- Five cameras can cover more entrances and outdoor areas than either smaller kit.
- Each camera offers 1080p video, infrared night vision, and two-way audio.
- Enhanced motion detection and Alexa compatibility support everyday monitoring.
- Battery life is rated for up to two years, depending on settings and conditions.
Cons:
- The included Sync Module Core does not support local storage.
- Cloud clip storage and person detection require an optional subscription.
- The included AA lithium batteries are non-rechargeable.
Best for: Owners of larger homes or properties who have at least five useful outdoor camera positions.
Not ideal for: Households with limited mounting locations, or buyers who want rechargeable batteries or included local recording.
Bottom line: We would choose the five-camera kit when broad coverage is a real requirement and accept the extra devices and subscription-dependent storage.
“We would choose the five-camera kit when broad coverage is a real requirement and accept the extra devices and subscription-dependent storage.”
Blink Outdoor 4 Wireless Smart Security Camera System, 2-Camera Kit with Sync Module Core
The two-camera kit is the sensible entry point when we have a short, specific list of places to watch. A front door and a rear entrance, for example, may be enough for a smaller home or a targeted monitoring plan. It includes the same 1080p live view, infrared night vision, two-way talk, and enhanced motion detection found in the larger kits, so reducing the camera count does not remove the central functions.Its advantage over the three-camera option is a more focused setup: we are not finding a third location just to use the bundle. But compared with the three- and five-camera kits, it leaves less room to monitor side access, a driveway, or a detached area. The batteries are rated for up to two years, and Alexa compatibility fits households already using that ecosystem. As with the larger options, the Sync Module Core does not provide local storage; person detection and cloud clips need an optional subscription, and alternative local-storage equipment is sold separately. This is a good fit for limited coverage, but buyers planning to monitor several approaches should consider the three-camera kit instead.
Pros:
- Two cameras fit focused monitoring without extra unused viewpoints.
- Provides 1080p live view, infrared night vision, and two-way talk.
- Enhanced motion detection and Alexa compatibility are included.
- Batteries are rated for up to two years, depending on conditions and use.
Cons:
- Two cameras may leave gaps when monitoring a larger property.
- The included Sync Module Core does not support local storage.
- Person detection and cloud clip storage require an optional subscription.
Best for: People who want to monitor two specific entrances or outdoor areas with a battery-powered Alexa-compatible setup.
Not ideal for: Buyers who need coverage around several sides of a home or want local storage included.
Bottom line: We suggest the two-camera kit for targeted monitoring, while households with more than two priority areas should step up to the three-camera bundle.
“We suggest the two-camera kit for targeted monitoring, while households with more than two priority areas should step up to the three-camera bundle.”
As an Amazon Associate we earn from qualifying purchases.
Before You Start
Decide what you need to see before you mount anything. Entryways, driveways, and shared access points may be useful locations, but keep camera views limited to your own property. Avoid bedrooms, bathrooms, neighboring windows, and areas where household members expect privacy. Check camera placement from the app before drilling when possible; a few inches of repositioning can change the view substantially.
Use a strong, unique password for the camera account and turn on multifactor authentication if offered. Install the app from your device’s official app store. If the camera uses a rechargeable battery, charge it before installation so setup is not interrupted.
Step-by-Step Instructions
Step 1: Plan each camera’s view
Walk around your home and identify the specific area each camera should cover, such as a front door or gate. Choose a position that captures faces and activity clearly without pointing into private areas or onto a neighbor’s property. Check for nearby power, a suitable Wi-Fi signal, and a stable mounting surface. For an indoor camera, place it where furniture or curtains will not block the lens.
Tip:Do not aim directly at bright windows or the rising or setting sun; strong backlight can make people appear as silhouettes.
Check: You can name the area each camera will monitor, and the proposed view stays within appropriate boundaries.
Step 2: Prepare the camera account and network
Install the camera maker’s app, create or sign in to your account, and set a unique password. Turn on multifactor authentication if available. Confirm that your phone is connected to the home Wi-Fi network the camera will use, and check whether the camera requires a particular band, such as 2.4 GHz. Keep the Wi-Fi password available for pairing.
Tip:If your router combines Wi-Fi bands under one network name, follow the camera maker’s pairing instructions. Some cameras need a temporary connection to a specific band during setup.
Check: You can sign in to the app, and you have the correct network details ready.
Step 3: Add and update the camera
Connect the camera to power or install its charged battery. In the app, choose the option to add a device, then follow the prompts to scan its setup code or pair it with your phone. Select the correct Wi-Fi network and enter its password. Keep the camera close enough to the router during pairing. When the app offers a firmware update, install it before mounting the camera.
Tip:Use the setup code supplied with the camera or printed on its label; do not post it publicly or share it with people who should not access the device.
Check: The app shows the camera as connected and displays a live view.
Step 4: Test the view before mounting
Hold the camera at the planned position, or place it temporarily on a stable surface, and open its live view. Check that the main approach or entry point is visible at different times of day. Adjust the angle to reduce glare and avoid recording private spaces. Walk through the area and confirm that a person is large enough in the image to recognize.
Tip:Test night vision after dark or use the app’s night-view mode if it offers one. Reflections from glass can make night footage difficult to read.
Check: The live image covers the intended area, shows useful detail, and does not expose spaces you do not intend to monitor.
Step 5: Mount the camera securely
Mark the mounting holes while holding the bracket in the tested position. Check for hidden wiring or pipes before drilling. Use the supplied screws and anchors suited to the wall material, then attach the bracket and camera according to the maker’s instructions. For a wired outdoor camera, route and secure the cable so it cannot be pulled loose or create a trip hazard. Keep connectors protected from rain as directed by the manufacturer.
Tip:Use a stable ladder on level ground and keep three points of contact while working. Ask someone to steady the ladder when practical.
Check: The camera does not wobble, the lens remains aimed at the tested view, and cables and connectors are secure.
Step 6: Set recording and alert options
In the app, choose when the camera should record and which motion or sound events should trigger notifications. Set activity zones over the areas that matter and exclude sidewalks, roads, or moving trees if they cause unwanted alerts. Choose a recording schedule that fits your needs, then review the storage options and any subscription limits. Use audio recording only when appropriate for your location and household.
Tip:Start with alerts for important areas and adjust after reviewing a few days of activity. Too many notifications can make useful alerts easy to miss.
Check: The camera records according to your selected schedule, and the alert zones focus on the intended area.
Step 7: Test alerts, recordings, and account access
Walk through the camera’s activity zone and check whether the expected notification arrives. Open the event and confirm that the clip plays with the correct date and time. Test live view while your phone is on mobile data, if you plan to check cameras away from home. Review who has access to the account and remove any unneeded shared users.
Tip:Allow for a short delay between movement and a notification. If the camera offers a test alert, use it as well as a real movement test.
Check: You can see a live image remotely, receive an alert for relevant activity, and play a recent recording.
Step 8: Review security and privacy settings
Turn on automatic firmware updates if the camera supports them, and keep multifactor authentication enabled. Review privacy settings, notification permissions, recording retention, and any sharing links. If the camera has a physical privacy shutter or a mode that pauses recording while household members are home, set it to match your routine.
Tip:Revisit shared access when a household member moves out or a temporary guest no longer needs access.
Check: The account has only intended users, recordings follow your chosen retention settings, and privacy controls behave as expected.
Common Mistakes to Avoid
- Setting motion alerts too broadly. — Use activity zones and refine sensitivity after reviewing real event clips.
Troubleshooting
Problem: The camera will not connect to Wi-Fi.
Solution: Move it near the router, verify the network password, and confirm the required Wi-Fi band in the camera’s instructions. Restart the camera and router if pairing still fails, then retry setup in the app.
Problem: The live image freezes or drops out.
Solution: Check Wi-Fi strength at the camera, move the router or camera if practical, and reduce obstacles between them. Restart the camera and confirm that its firmware and app are current.
Problem: The camera sends too many alerts.
Solution: Narrow the activity zone, lower motion sensitivity, or change the schedule. Check the event clips afterward to confirm that important activity still triggers alerts.
Problem: No recording appears after motion.
Solution: Check that recording is enabled for that time, the activity zone includes the movement, and storage is available. Confirm the camera has power and a network connection, then repeat a movement test.
What Success Looks Like
The setup is complete when each camera stays securely mounted, shows the intended area in a clear live view, and remains connected to the network. A test movement should produce the expected notification and a playable recording with the correct time. Remote viewing should work if enabled, and account access, privacy zones, and recording settings should match your choices.
Next Steps
Review a few event clips during the first week and adjust the camera angle, activity zones, or sensitivity if needed. Check battery level, lens cleanliness, Wi-Fi status, and storage periodically. After a power or router change, confirm that every camera reconnects and repeat a notification test. Keep the app and camera firmware up to date.
Frequently Asked Questions
Should I use cloud storage or local storage?
Compare the camera’s storage options, subscription fees, retention limits, and access method. Cloud storage can preserve clips if the camera is damaged, while local storage may avoid a recurring plan. Choose an option you can access and maintain reliably.
Can I install an indoor camera facing through a window?
You can try it, but glass reflections, glare, and night vision can reduce image quality. Test the view in daylight and darkness before fixing the camera in place. An outdoor-rated camera mounted outside often avoids those problems.
How high should I mount an outdoor camera?
Mount it high enough to reduce casual tampering while keeping faces and activity recognizable. Follow the maker’s placement guidance and test the live view from the planned height; excessive height can make useful details hard to see.
Why do I receive alerts when nobody is at the door?
Wind-blown branches, changing light, pets, and passing traffic can trigger motion detection. Adjust the activity zone and sensitivity, then review sample clips to check that genuine arrivals still trigger alerts.
How often should I check the cameras?
Check status and battery level periodically, and inspect recordings after app, router, or power changes. Clean the lens when the image looks hazy and test alerts after changing camera settings.
Evergreen bestsellers Picks
bestsellers
As an affiliate, we earn on qualifying purchases.